Wiring holes in F-706, F-707, F-708 2h
2h
September 7, 2022
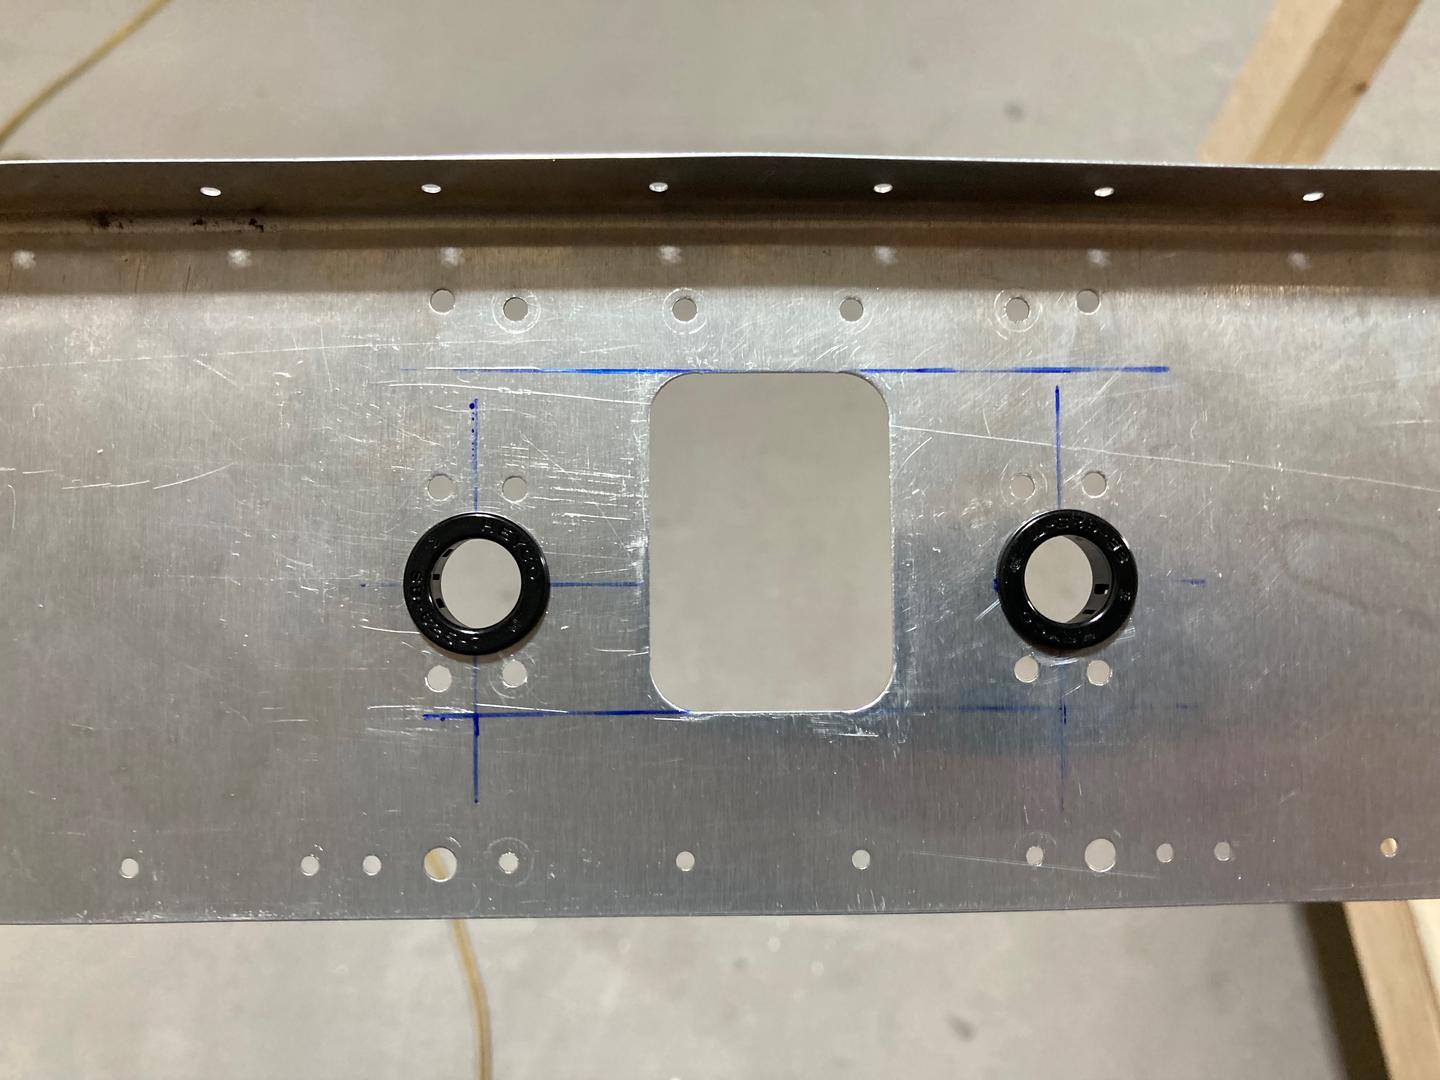
After some internal debating, I decided to drill the wiring / manual trim holes as per the plans.
I did not like the proposed location of the manual trim hole (and the symmetric wiring hole), so for some time, I considered moving them somewhere else. Doing these holes per the plans would leave a very marginal edge distance to the four holes around it (would be ~1.5D) and also requires drilling with precision.
However, in the end, I still followed the plans since I thought it would be easier than to re-route the wires. Also, looking at the plans, it seems like the central area is covered with a removable cover, which would help to do the maintenance and/or adjust the wiring.
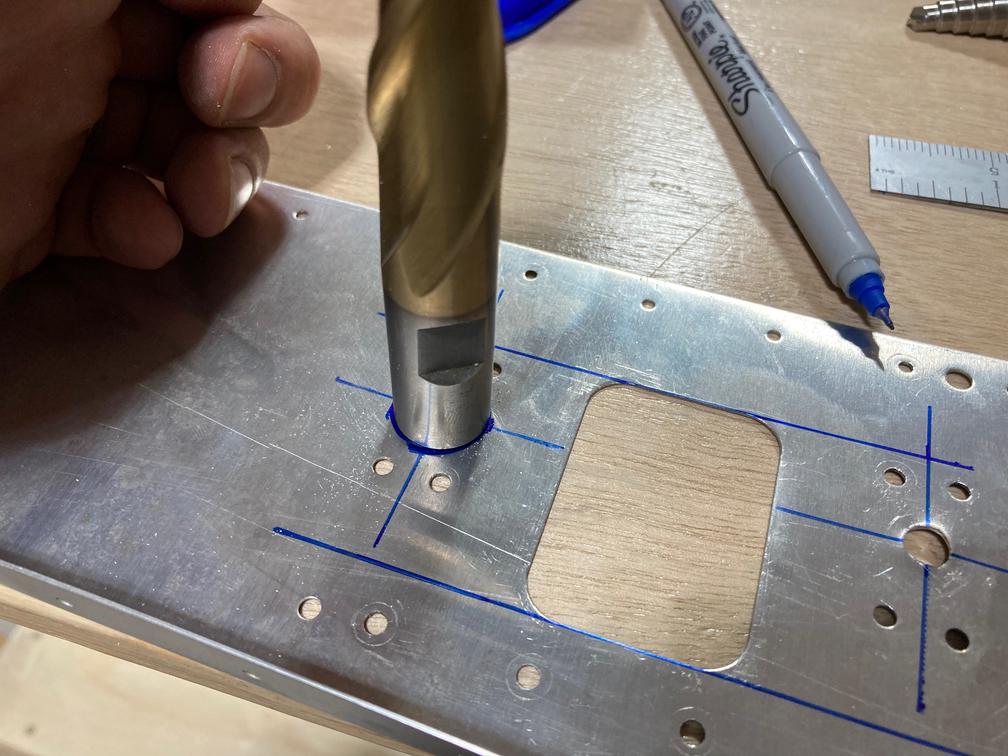
To prevent holes from migrating while drilling, I marked the desired location by tracing around the 5/8" endmill.

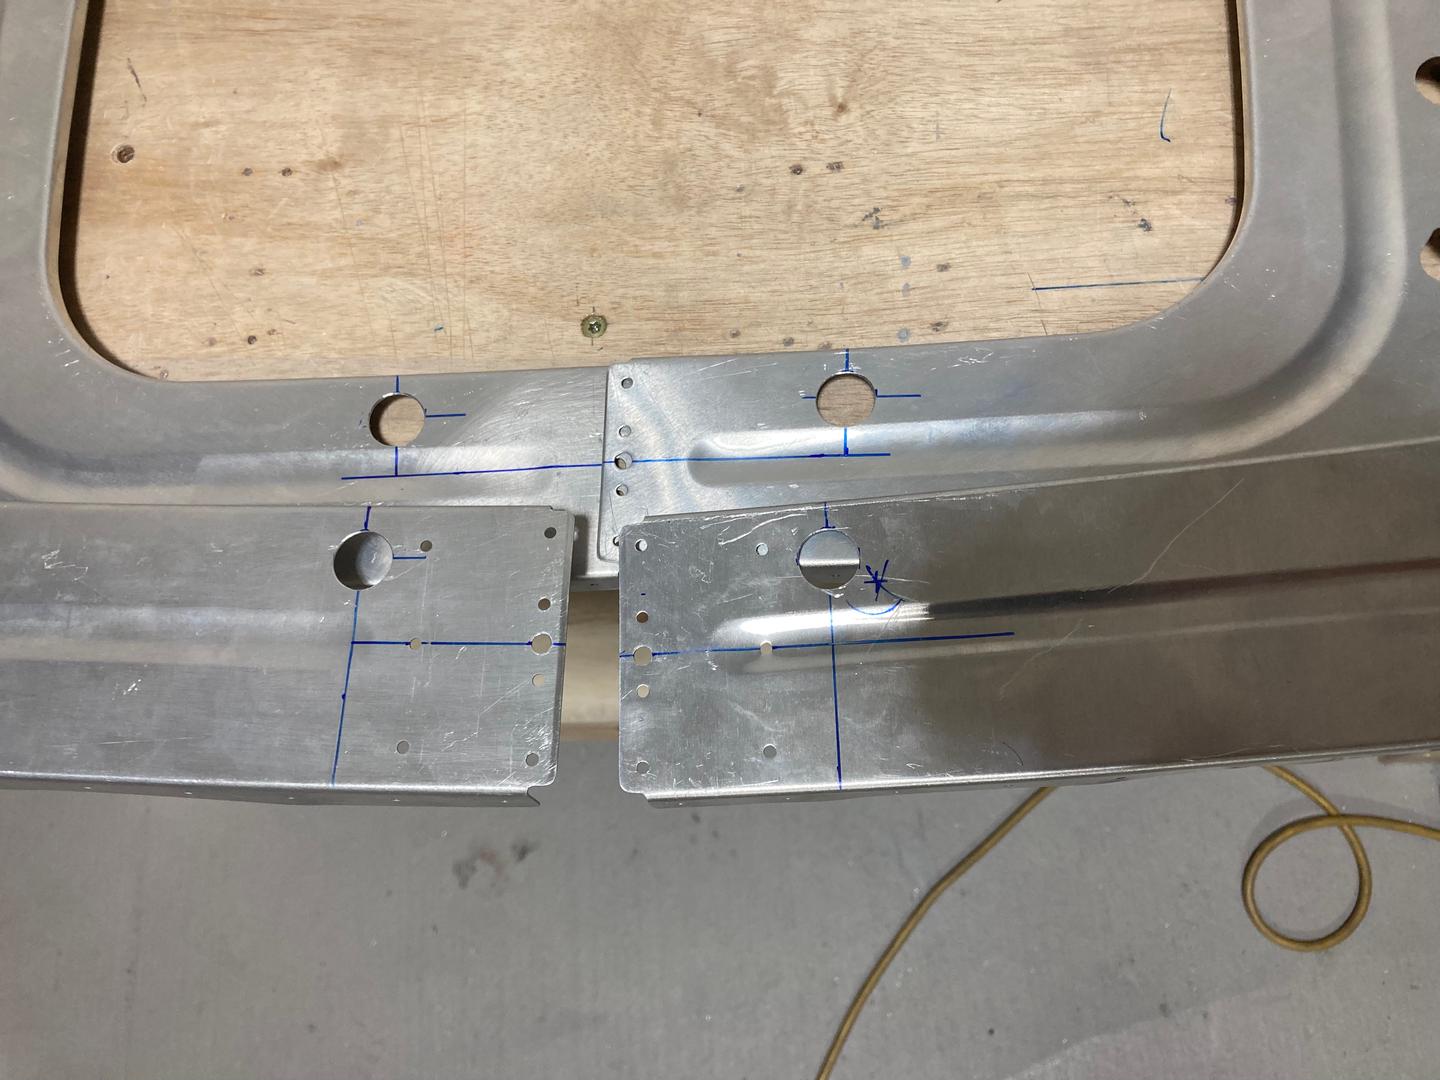
Then I started drilling the hole. I only drilled it through the F-706B bulkhead, with all other parts removed. The reason is that the F-730 reinforcement plate only covers half of the hole, which would make unibit to wander from the desired location.
First I drilled the hole with the #41, then with the 1/4", and finally with the unibit. One of the holes started moving sideways, so I stopped at 9/16" and used a file to finish the hole. In the end, both of the holes were where I wanted them.
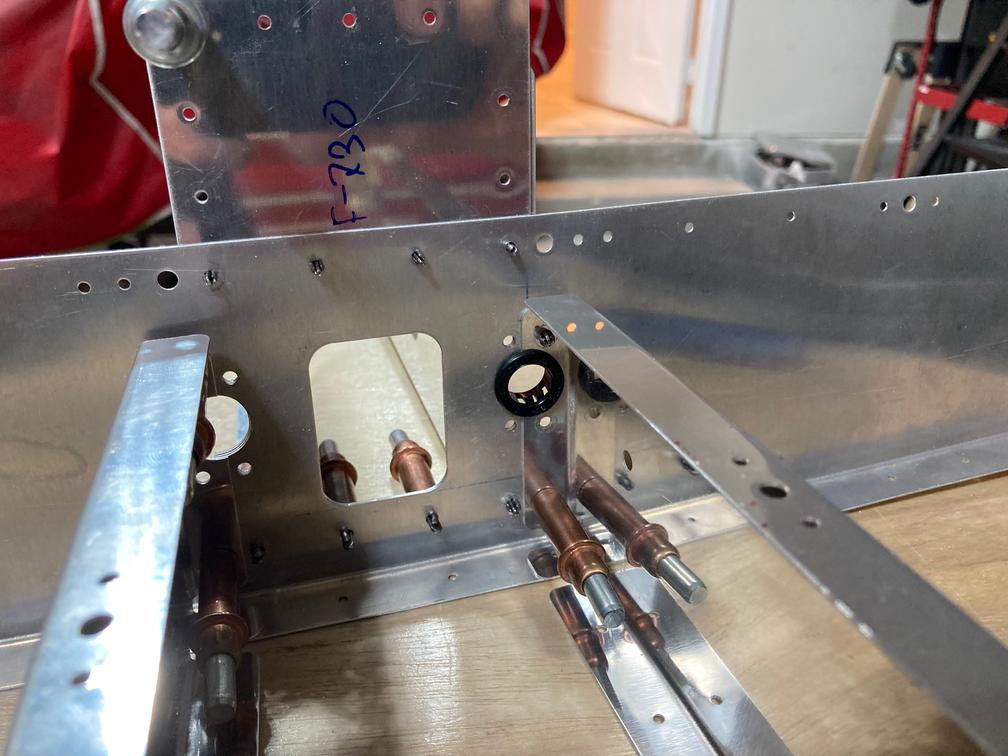
To make matching holes on the other parts (the baggage ribs, the bellcrank rib, the bellcrank channel, and the reinforcing plate), I traced the hole to them with a sharpie, then used my files to cut (all of these parts get only half of the hole).
I am pretty happy with the results.

Then I drilled 5/8" holes through other bulkheads. The location of these holes is not as critical, so I used unibit to drill them. To make sure the holes don't move too far away, I marked the four edges of the holes (5/16" from the center in each of the four directions).
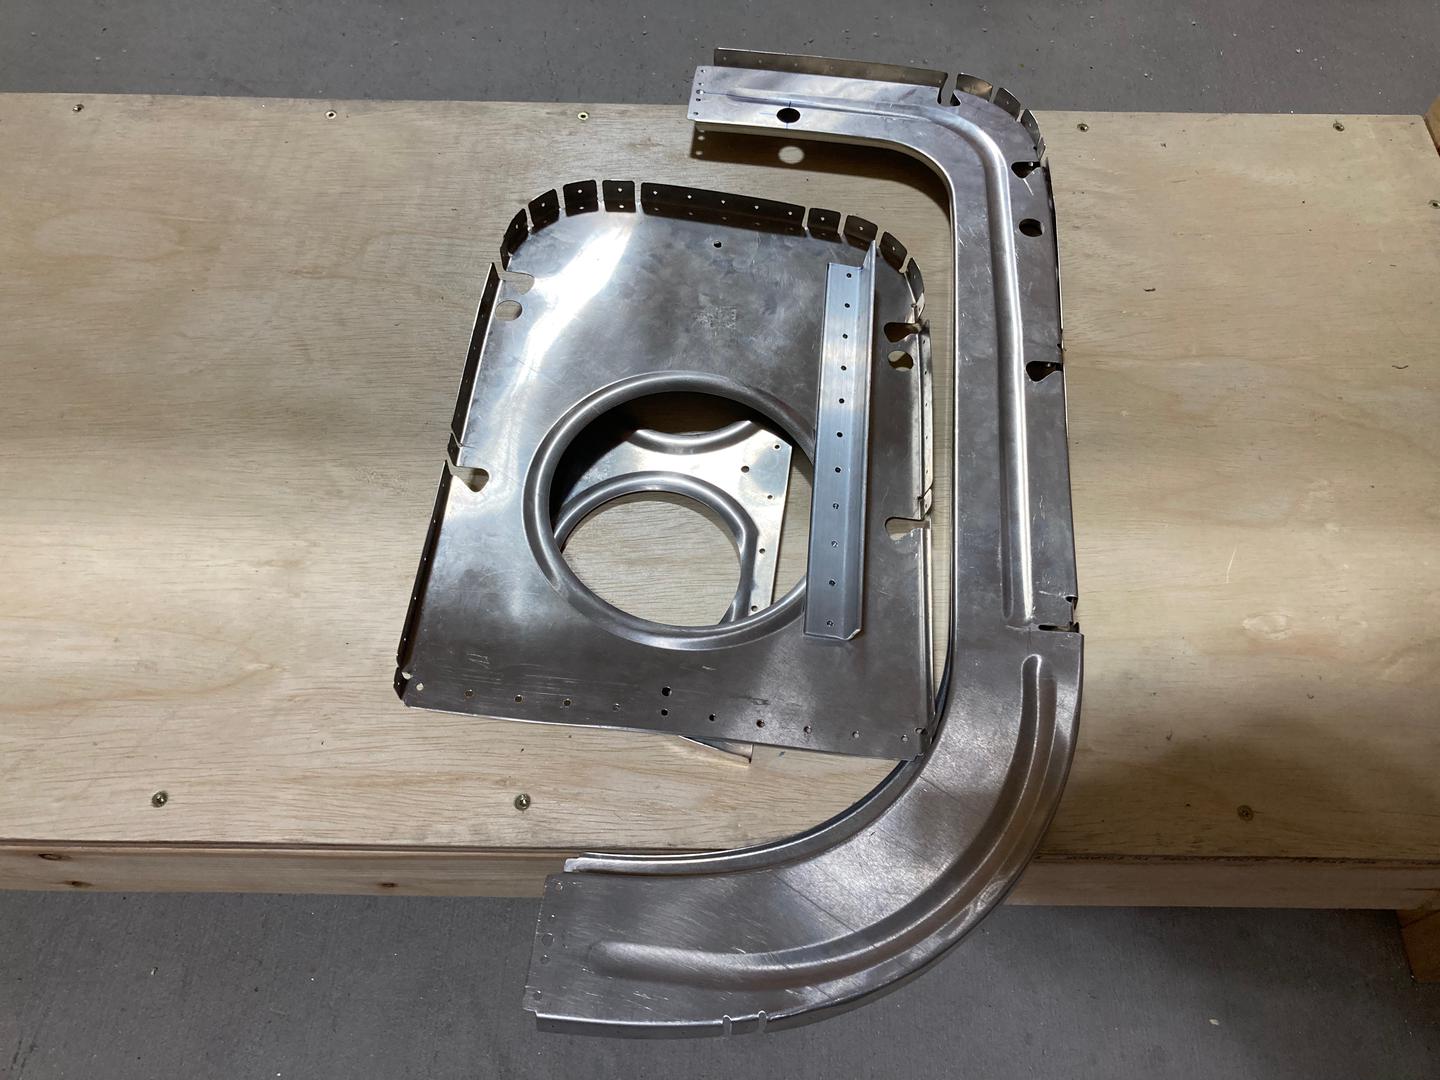
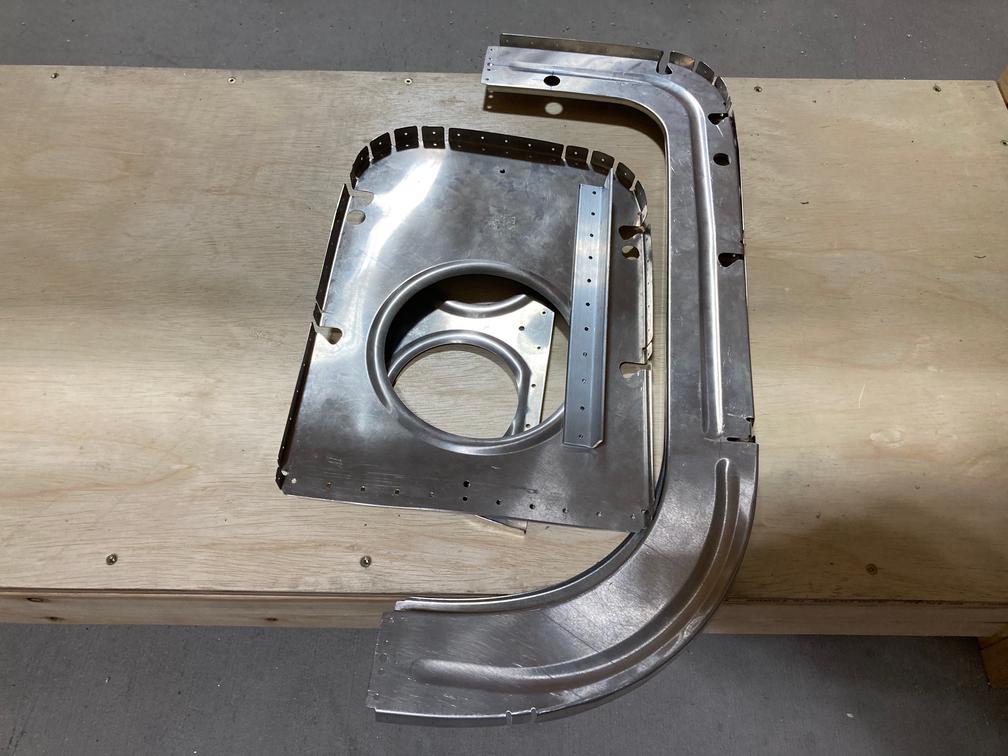
Then it was the deburring time. I started deburring all the bulkhead parts in preparation for the priming session. Here are some of the parts I have deburred (it takes a lot of time to deburr all the nooks and crannies of the bulkheads).