Fluting the seat ribs 3h
3h
October 11, 2022
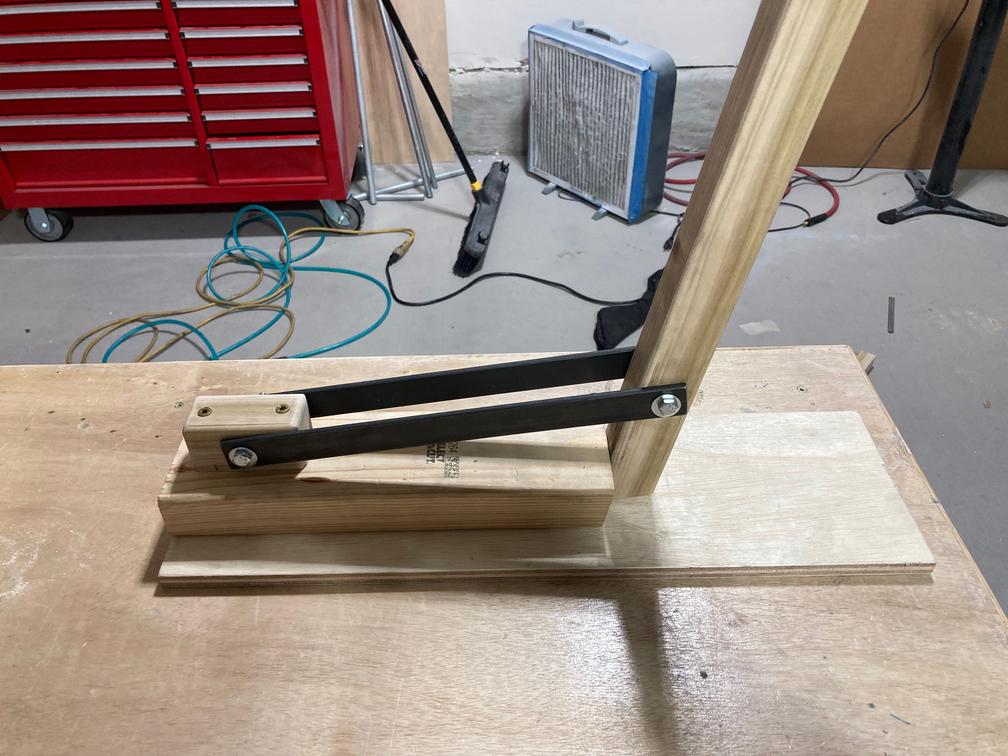
Today I built a tool to straighten flanges and fluted seat ribs.
I used the plans for the tools from the RV7-Factory blog post.

The tool in action.

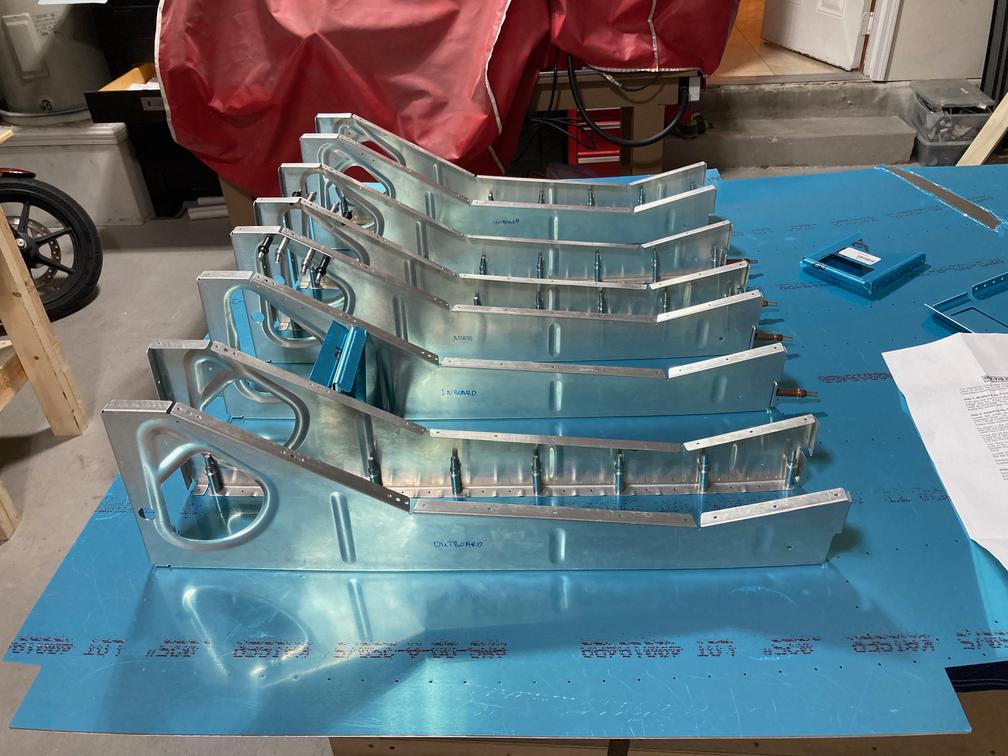
After that, I fluted all the seat ribs and clecoed them to the bottom skin. I don't have the center section, but at least I want to fit the crotch straps and maybe drill the seat ribs to the skin.

The crotch strap comes as a mini-kit with a separate manual documenting the installation. However, since the seat floors already have all the holes for the crotch straps (the opening and the four holes for screws), I plan to use a different process to fit the brackets.
To optimize the edge distance for the screw holes on the brackets, I drew two lines on the flanges of the crotch brackets. The lines are spaced 1-9/32" (the same as the holes) and are located at the same distance from the edges. I clamped the brackets so both lines could be seen in the holes in the seat floors.
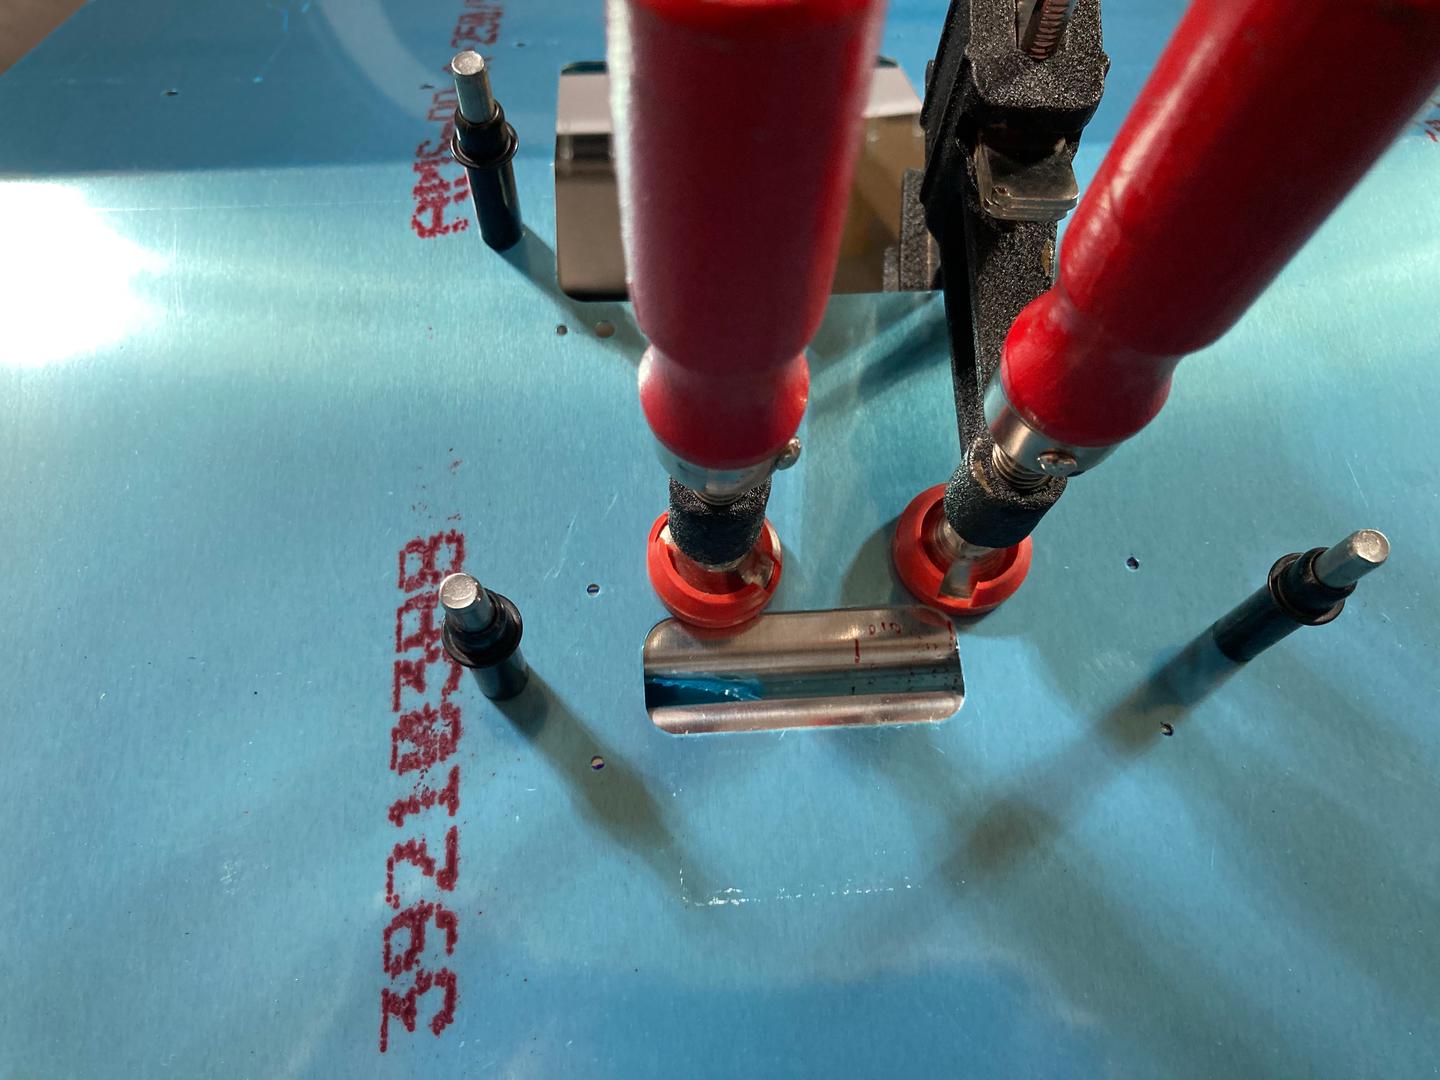
The next step would be to drill the four holes from the seat floor, cleco brackets to the floor, then drill the front bracket to the ribs using the angle drill (since I have access to it from the front). Finally, remove the floor and drill the aft bracket.
P.S. See my update from January 6th, 2023. I would not recommend drilling the four holes for the screws on the straps at this point. Much better to wait until everything in the center section is fully locked together.