Back to the fairings! 4h
4h
September 20, 2023
Back to the vertical stabilizer and the bottom rudder fairings.
Since I want to mount a beacon light on the top of the vertical stabilizer, I need a way to fasten it inside of the fairing. The idea is to push the light such that it sticks from the top of the fairing, then clamp it from the bottom with a plate.
There is a warning on VAF that the red flashes might reflect into the cockpit if mounted that way. I'll see how it goes. An alternative was to mount it either on top of the fuselage (either on top of the turtle deck or on the bottom of the fuselage) or on top of the rudder top fairing.
Initially, I wanted to mount it to the top of the turtle deck, but since I don't have a finishing kit, I don't know how much space I would have there. I also plan to install a Supertracks Canopy Track Extension from Flyboy Accessories, so I don't really know where exactly the canopy will stop. Plus, I am considering placing an ELT antenna there, in front of the vertical stabilizer.
The fuselage bottom is too low, I don't think it will be visible well. The rudder top fairing is a good option, but I don't have a way to run the wires as the rudder is fully assembled yet. Same story with the vertical stabilizer, but there are only two ribs I need to go through, so it should be easy.
If it reflects too much I can either block the front of the light or I can lower it a bit -- with the mounting style I am planning to do, it should be easy to adjust the height.
This is how I want to mount the beacon.
![]()
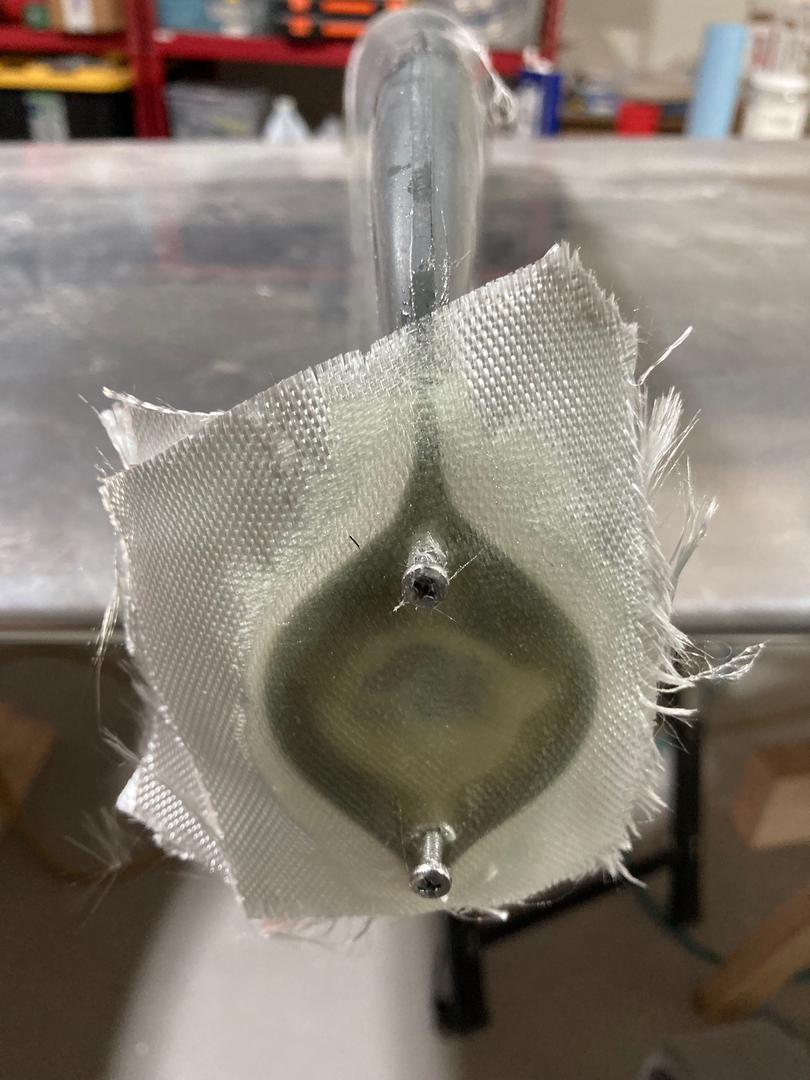
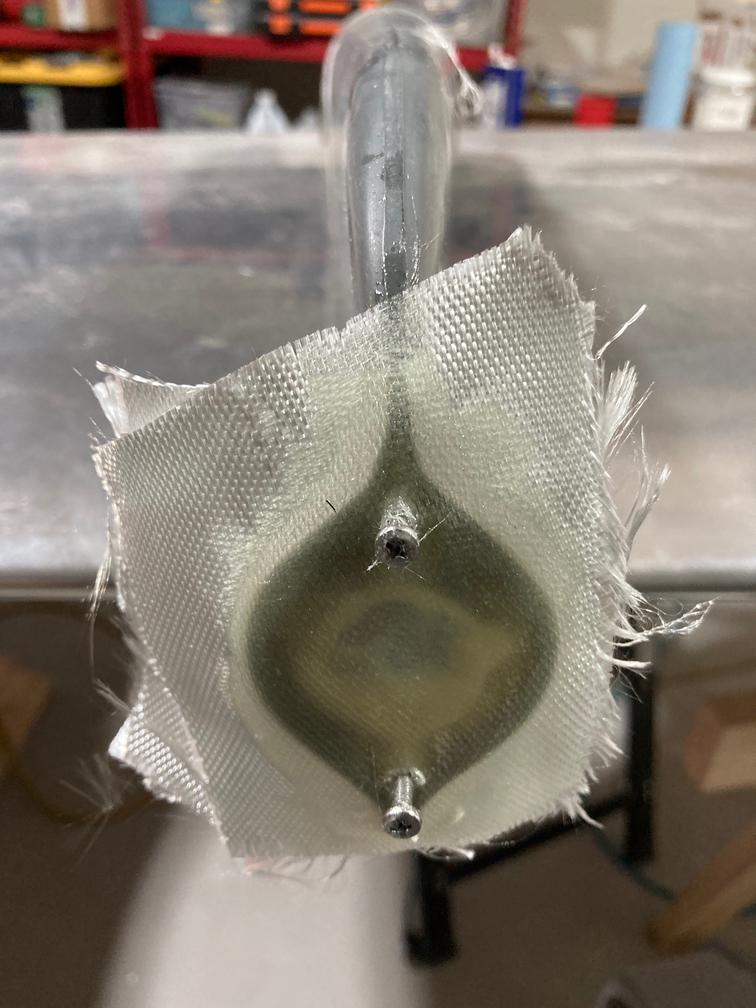
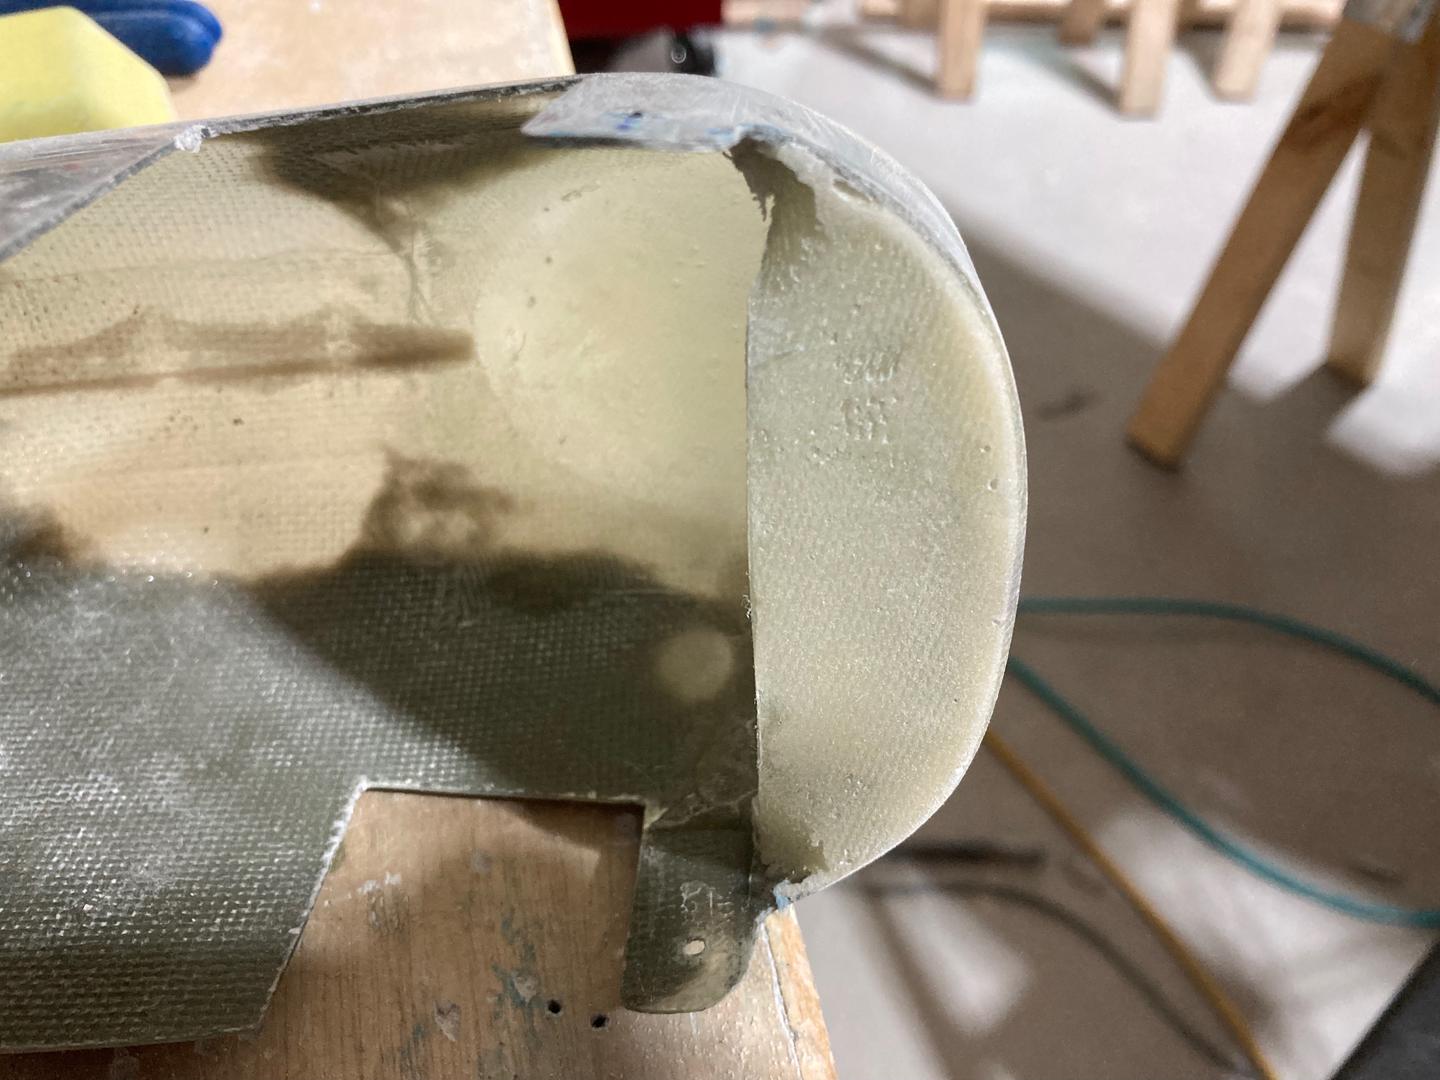
To mount the beacon, I cut the hole in the fairing and machined two aluminum inserts for the threads. The idea is to form the seat with the epoxy flox mix. I also made a plate that will clamp the beacon from the bottom. The inserts.
![]()
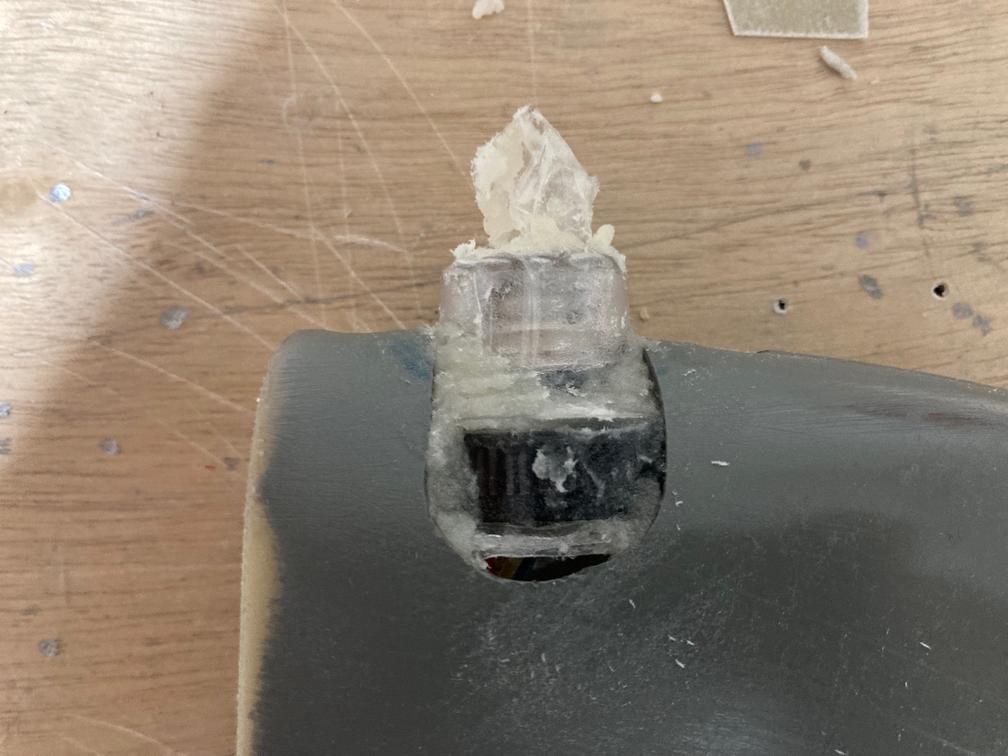
This is what it looks like from the outside.
![]()
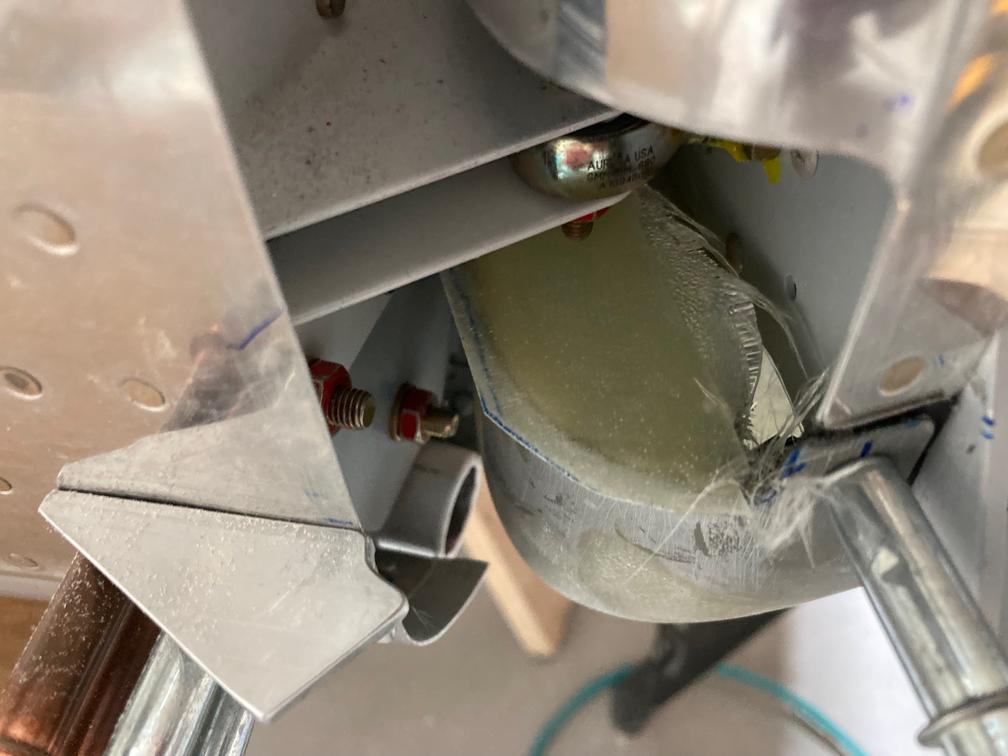
And the inside.
![]()
After covering the beacon with the packing tape, I mixed the epoxy flox and glued the inserts in place. I scuffed and filed the inserts to ensure better bonding.

The important part of this step is to epoxy the inserts and create a seat for the beacon and for the clamping plate as well. The sides will be filled with epoxy later.
Parallel to that work, I was working on the bottom rudder fairing. I created a laminate to make the closing cap for the forward part of the fairing and glued it in place. Same technique as with other fairings: first, I glued the cap with CA glue from the outside, then epoxied it inside.

However, this didn't go exactly as planned. The outside cap delaminated from the inside. Not sure what has happened. I don't remember which epoxy I used (for all my previous work I used T-88 epoxy, but since I was running out of it, I bought Aeropoxy). I think, what happened is that I sanded the laminate to make it stick, but I forgot to clean it. So probably all that dust was the reason for poor bonding. No big deal, I can add a new top layer. Two inside layers of fiberglass cloth stuck well (although, the corners are not great), so I just need to add a new top layer.
Then I cut a hole for the tail light.
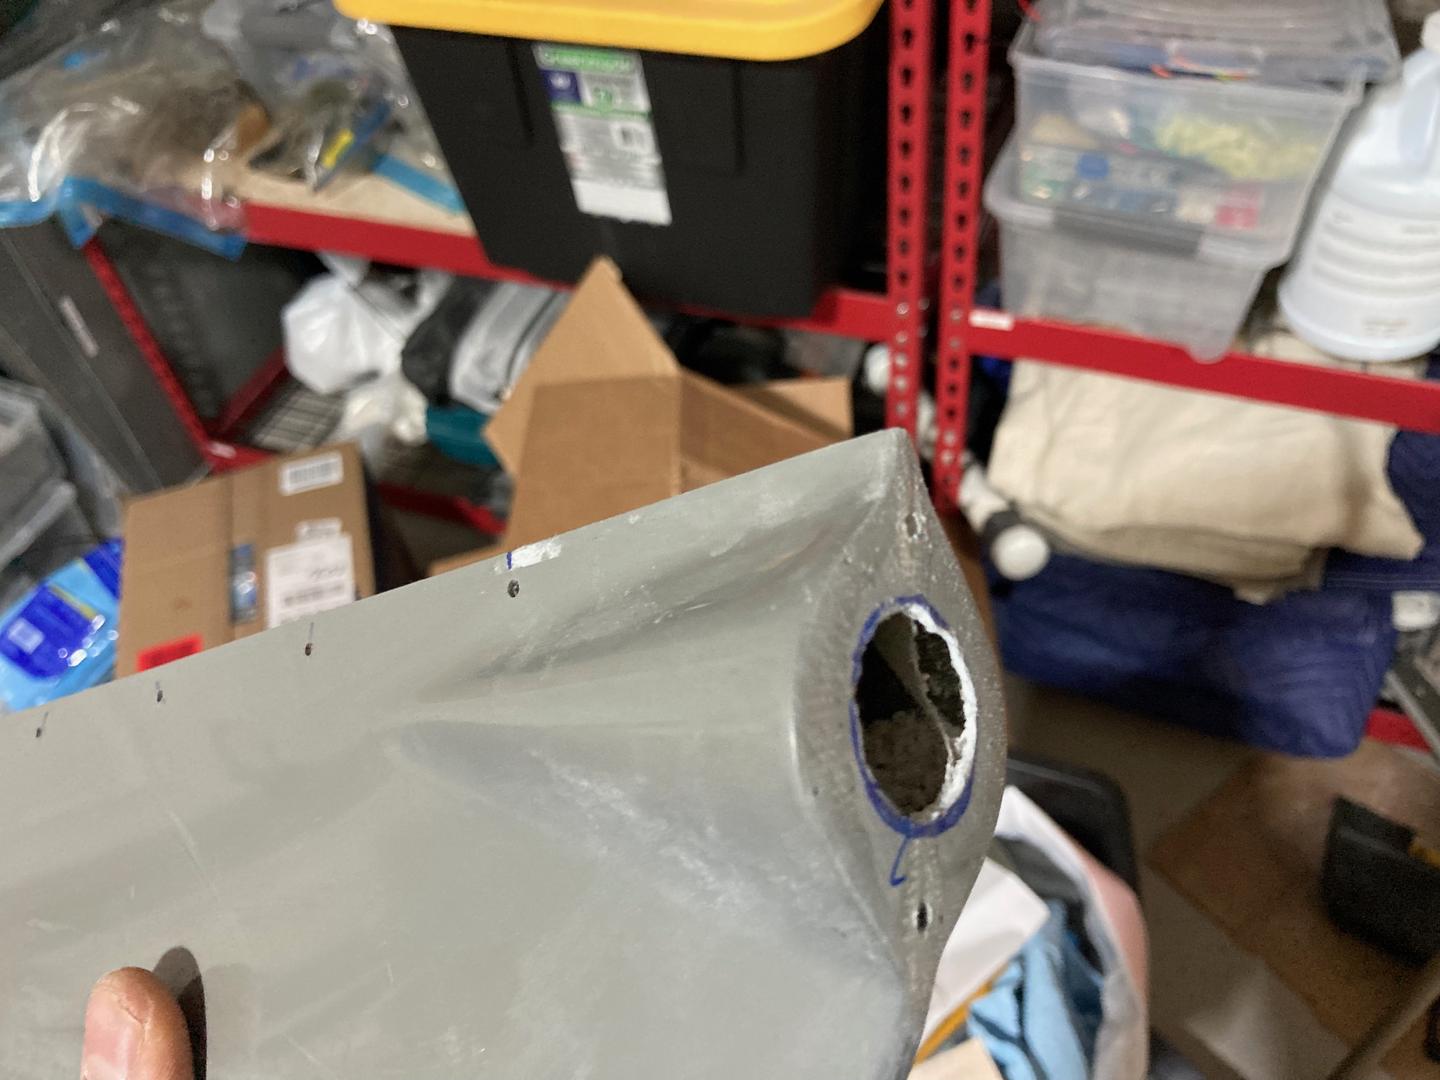
I wasn't impressed with the quality of the aft part of the rudder fairing. There were a few layers of fiberglass cloth that didn't stick to each other. It pretty much fell apart when I cut the hole. To reinforce it, I glued two layers of the fiberglass cloth from the outside.
Also, I added some epoxy flox mix on the inside around the hole to reinforce it as well. And I put the mounting bracket into that flox mix, then I put two screws to hold the bracket in place.